
Wednesday, November 30, 2011
Two Weeks until my Holiday Give-A-Way Show!!!
Just a short report...15 gifts and counting!!! WOOHOO!!! This is going to be fun to have so many winners! :)

Friday, November 18, 2011
Utah's Crafty Chick Ultimate Holiday Give-A-Way!!!
Ok, so I came up with an idea to do a show where I give away 40 gifts! It is in the works and you don't want to miss it! My first Holiday give-a-way show is fast approaching...on Wednesday, December 14th at noon! Any companies that would like to participate please contact me for all the details. I am so excited to see how big I can make this and hopefully make this an annual tradition! Wish me luck...and all those who might win gifts! :)
Happy Crafting!
Happy Crafting!
Wednesday, November 16, 2011
Compartment Books
Secret Compartment Books
by Wendy Switzer
Level: Intermediate
Time to complete: 3-4 hours

Supplies:
- Used Book or a dollar store book - 1"-2" thick
- Craft blade
- Mod Podge
- Foam brushes
- Decorative paper
- Coordinating Embellishments
- Strong Clamps of any kind - 4 small and 4 XL
- Chipboard
- Paper cutter
- Magnet or velcro
- Pencil & ruler
Instructions:

- Decide how many pages you would like to have left in tact. Secure those to the front cover using a few small clamps.
- Use XL clamps to hold the remaining pages together and glue together the edges using mod podge and a foam brush. Wait for it to dry completely...30-60 minutes and repeat this step about 3 times.
- Once your pages are dry, measure 1" away from each edge and use a pencil to create a rectangle on the first page of your base (the glued together pages). Using chipboard, make a template the same size as the rectangle on your page.
- Use the chipboard rectangle, and craft blade, to begin cutting away the insides of your pages. This takes a while to cut away the insides. Usually you can only cut through about 6-8 pages at a time.
- Once you have reached the desired depth in cutting away the pages, use a glue gun or other strong glue to secure the last page to the back inside cover of the book.
- When the back cover is completely secured, paint the inside cut edges with mod podge to seal them. This step may be repeated as many times as necessary. You can also cut pieces of chipboard or felt to glue along the inside edges and bottom to give it a nicer look.
- Add a magnet, velcro or tied ribbon to prevent items from falling out of the book when closed.
- Next decorate the outside with with paper, ribbon, embellishments, etc. to complete the look desired.
- Book can be used to hide things in or can be used as a shadow box display on an easel.


Use old phone books...I used two different sizes to create this secret compartment...


Wednesday, October 5, 2011
Kathryn Beck Art
Cube Art
by Kathryn Northrop
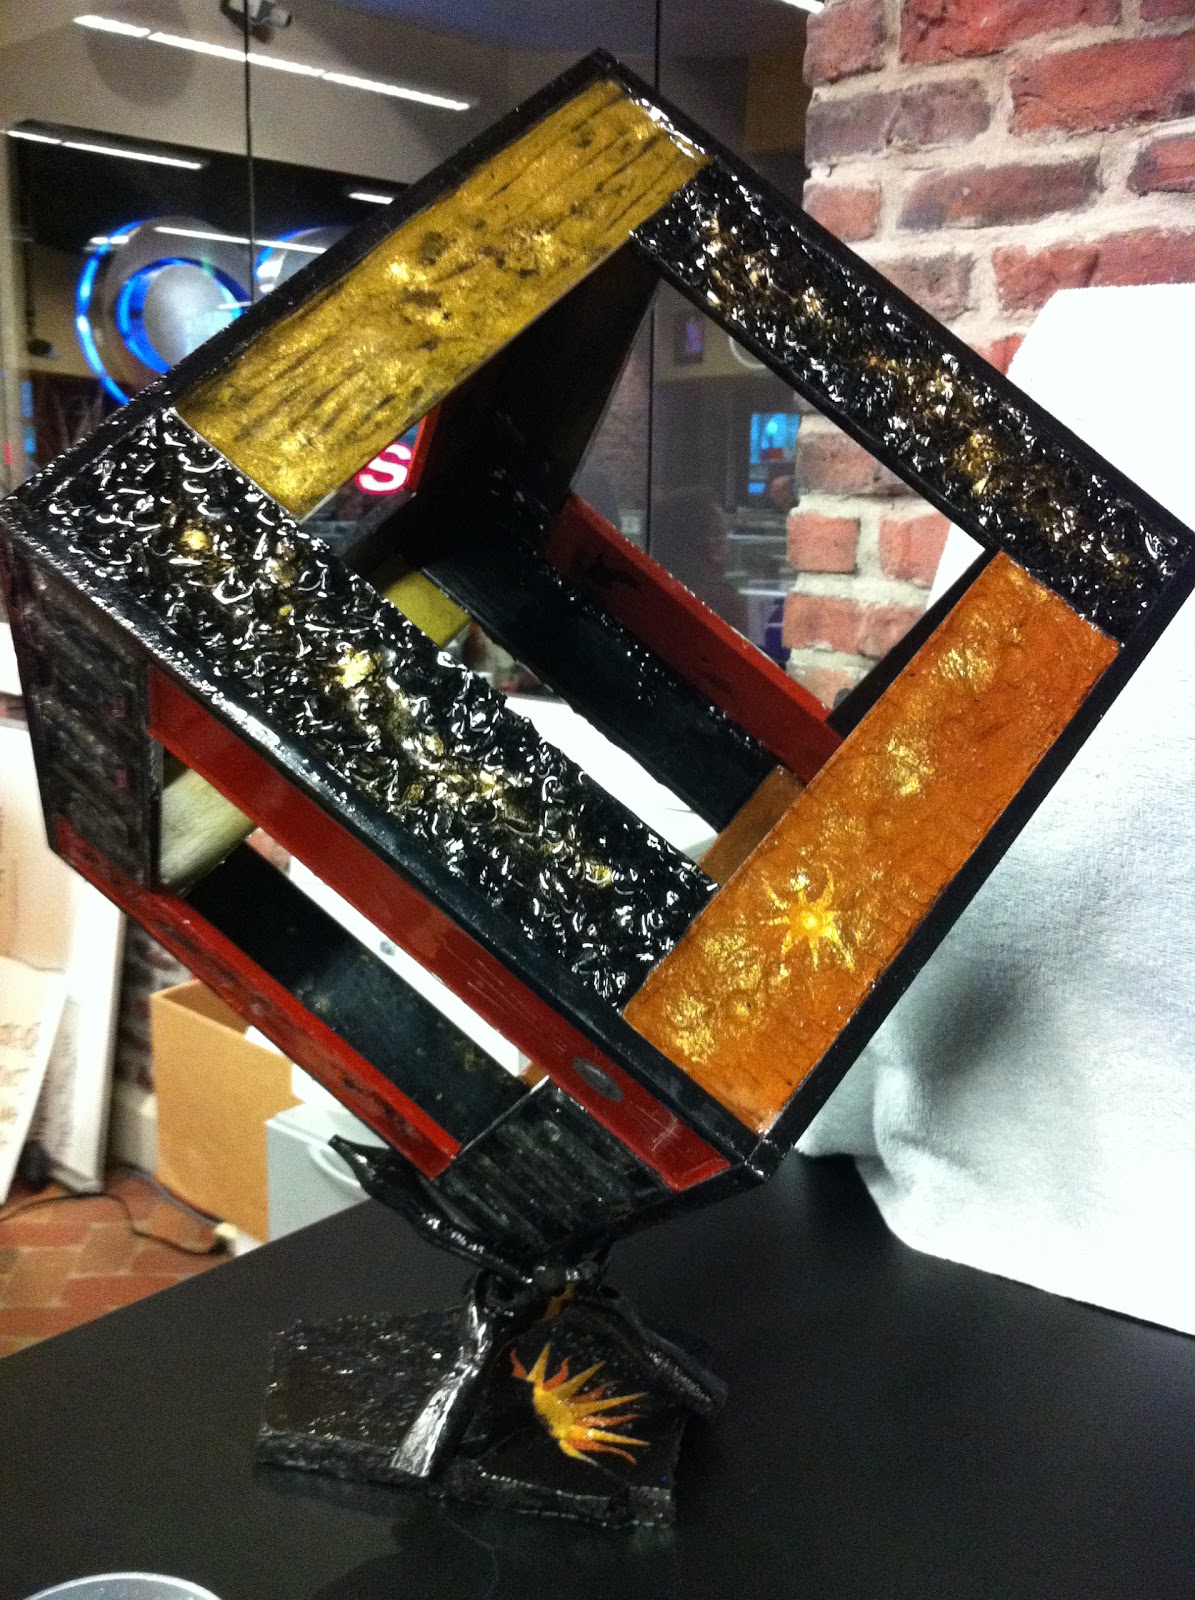


The pictures do NOT do them justice. They are simply stunning in person. Each one can have tea lights or larger lighting fixtures added so they illuminate into something amazing!
You can see all of Kathryn's beautiful cube art on her website www.cubeartist.com
Thanks so much, Kathryn, for sharing you talent with us today!
Guest Crafter today...
Don't miss our show today as I feature a local artist...Kathryn Northrop. Kathryn has a unique creative talent that she will share with us...AND...she has a give-a-way!
Be sure to tune in and support our local artists
KUTV Channel 2 Noon News
Be sure to tune in and support our local artists
KUTV Channel 2 Noon News
Wednesday, September 14, 2011
Scotch Brand Products
Fantastic Scotch Products to decorate without harming your walls or furniture!

Today we demonstrated the new Scotch "Restickable Tabs and Shapes". They are amazing for any of your household, decorating or crafting needs. The double-sided feature and flexibility of the tabs and shapes are perfect for just about any need...

Secure photos, calendars or even heavier items such as a clock to the wall!
- Convert your favorite magnets to stick on your stainless steel refrigerator!
- How about hang your children's priceless art,
- Secure your gaming sensors or favorite knickknacks.
- Cut the tabs to a precise size for any project or need.
The possibilities and uses are endless.

Use the "Restickable Shapes" and some flat glass pebbles to create a fake magnet! Or use the clear tabs to secure decorations around a frame that can easily be changed for the seasons or holidays!
The best feature....these amazing little gems are RE-USABLE! What a great value! No more sticky mess of adhesives, costly replaceable sticky strips, no holes in walls from push pins or the mess of a sticky putty. These products offer, not only a great convenience, but the money saving ability to be re-used again and again! And I know we all LOVE saving money!

Another benefit to these fancy little tabs are their strength!!! The clear TABS can securely hold up to 1 lb and the SHAPES can hold up to 3/4 lb. Perfect for the college dorm room, school lockers or just about any flat surface that you are needing to "glitz" up! For the upcoming holiday decorations...these are a MUST!
You can find these, and other Scotch products, at local merchandise, office, grocery or craft stores. They retail for $2.99-$3.99 and are a fantastic value considering these are a re-usable product!
Visit www.scotchbrand.com for more great products and information
Wednesday, September 7, 2011
Sit-Upon & Chair Organizers
Sit-Upon & Chair Organizers
by Wendy Switzer
Level of Difficulty: Advanced
Hours to Complete: 2 hours

Supplies:
- Sewing Machine, thread, bobbins, etc.
- Two 15X28 dishtowels
- Scissors or cutting mat & rotary cutter
- Yardstick or measuring tape
Instructions:
- Cut your dishtowels according to the pattern pictures below

- Fold the seat portion in 1/2 and sew the other long side together (wrong sides together). Turn right sides out.
- Hem one of the long edges of each of the pocket pieces. You can use larger pieces and attach elastic to the top edge to create a puffy pocket look.
- Next, sew the large pockets to each of the side pieces. Make sure your raw/unfinished edge is even with the bottom edge of your side pieces.
- If you desire to divide your large pocket into two pockets, now is the time to sew a dividing line to create that look.
- Next sew your small pockets onto the bottom edge of the side pieces (on top of the large pockets). Make sure your bottom edges are all even.
- Sew the top edge of your side pieces and your handle edges inside each open end of the seat piece, about 1/2" in.
- Decorate with embellishments if you desire.
- The handles allow you to keep hang up your organizer, neat & full of supplies, when you no longer are using it.

Side Chair or Under Matress Organizer:
- Cut a fabric piece 12X26
- Fold up the fabric 6" to create your pocket. Pin in place
- Sew two stitching lines, on your pocket, 4" apart. This divides your pocket into 3 pockets.
- Finish the edges...hem, use bias tape, serge, etc.

Back of Chair Organizer
- Measure across the chair back that your organizer will be used on. Add 3" to that measurment.
- Cut a piece of fabric 36"X (measurement of your chair).
- Fold over 10" and pin. This is that fabric than will be on the front side of the chair.
- Next cut pieces of fabric to the desired width and size of the pockets you want. Specific pockets can be created for your individual needs...for student dorm rooms, crafters, office worker, etc.
- Sew the pockets as you did above (arm chair organizer) and finish the edges.
- Decorate as desired.

Subscribe to:
Posts (Atom)